Web 自动化测试
直播前准备
| 专题课 | 阶段 | 教程地址 | 视频地址 |
|---|---|---|---|
| 用户端 Web 自动化测试 | L1 | Web 自动化测试价值与体系 | Web 自动化测试价值与体系 15:26 |
| 用户端 Web 自动化测试 | L1 | 环境安装与使用 | 环境安装与使用 33:05 |
| 用户端 Web 自动化测试 | L1 | web 浏览器控制 | web 浏览器控制 10:06 |
| 用户端 Web 自动化测试 | L1 | 常见控件定位方法 | 常见控件定位方法 23:17 |
| 用户端 Web 自动化测试 | L1 | 强制等待与隐式等待 | 强制等待与隐式等待 37:45 |
| 用户端 Web 自动化测试 | L1 | 常见控件交互方法 | 常见控件交互方法 19:47 |
| 用户端 Web 自动化测试 | L2 | 高级定位-css | 高级定位-css 48:12 |
| 用户端 Web 自动化测试 | L2 | 高级定位-xpath | 高级定位-xpath 31:09 |
| 用户端 Web 自动化测试 | L3 | Cookie 复用 | Cookie 复用 27:14 |
课程目标
- 熟悉 Selenium 框架与常用操作
- 掌握 Web 自动化测试用例编写能力
- 掌握 Web 自动测试实战能力
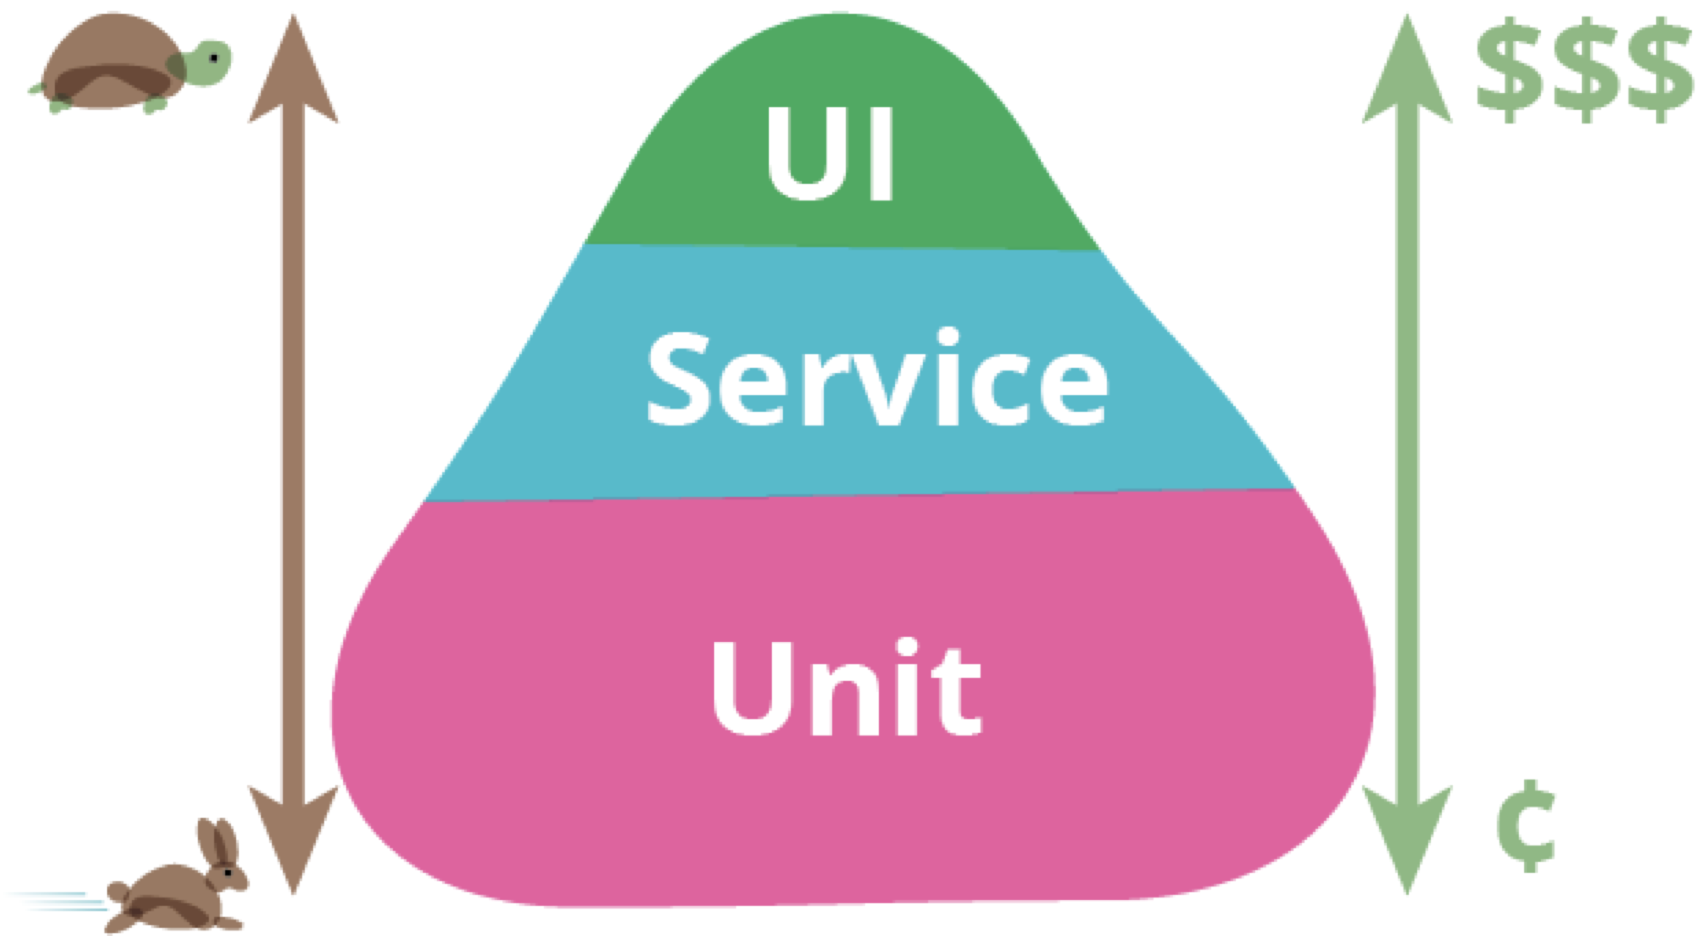
手工测试与自动化测试对比


Web 自动化测试合适场景
- 业务流程不频繁改动
- UI 元素不频繁改动
- 需要频繁回归的场景
- 核心场景等
知识点总览
点击查看:web知识点梳理.xmind
需求说明
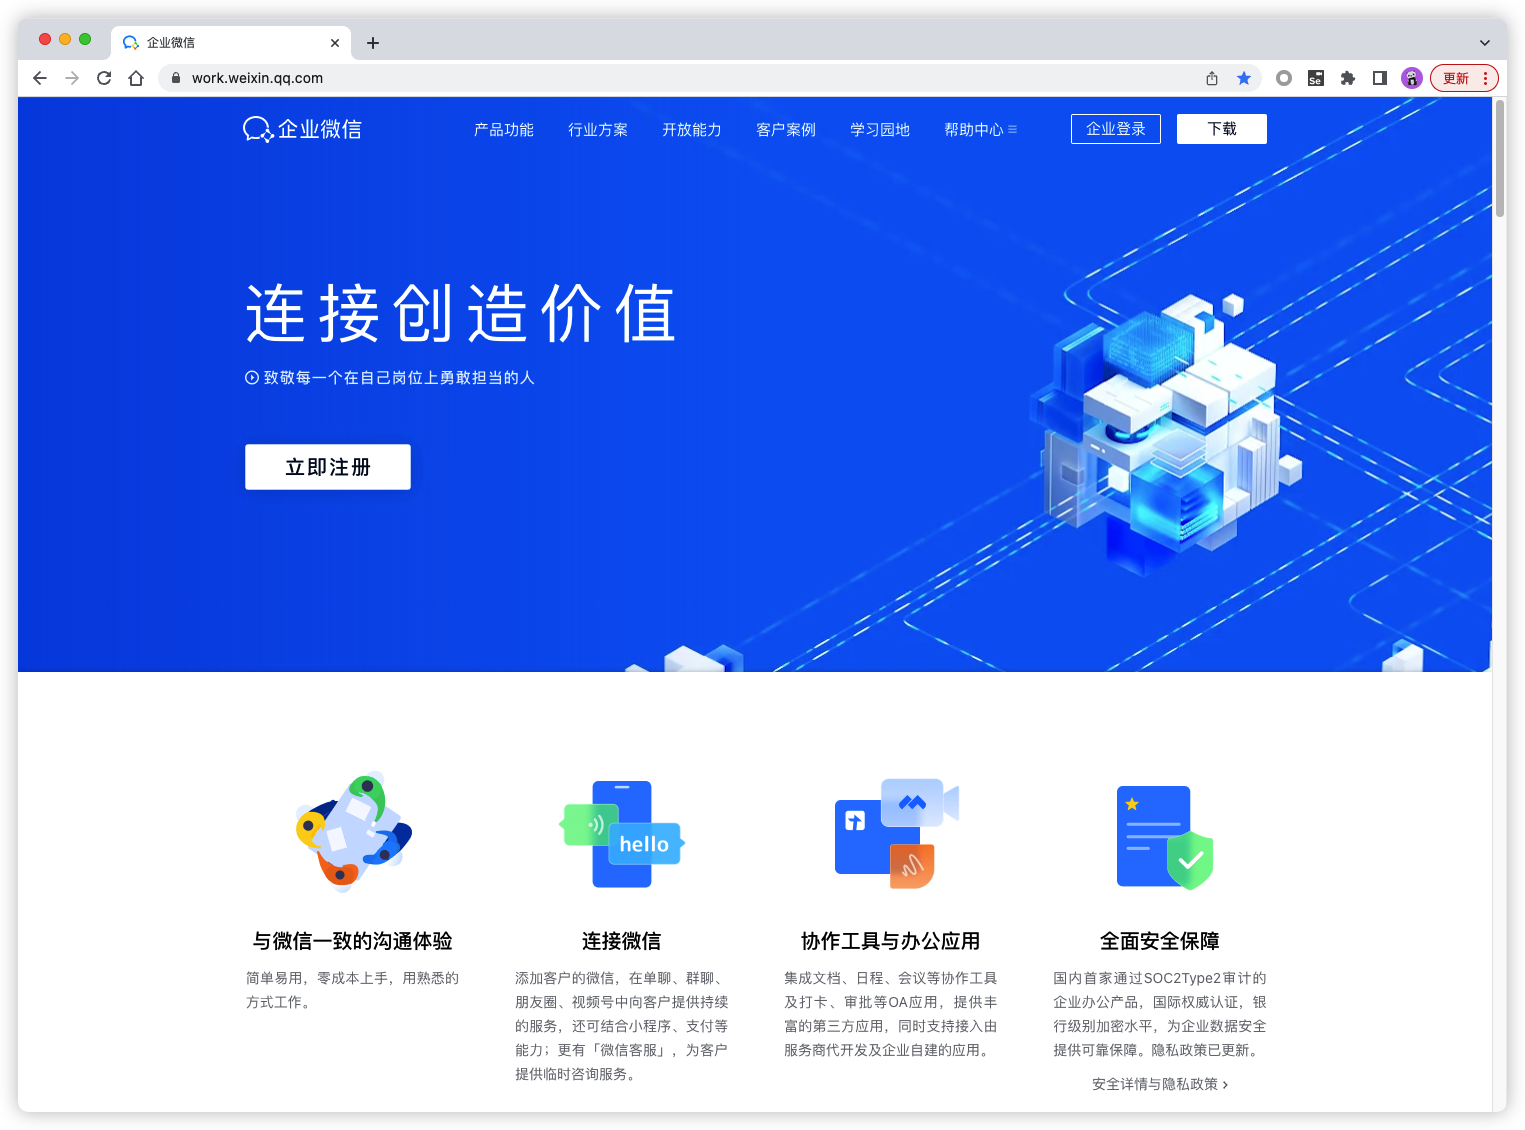
- 企业微信是腾讯微信团队打造的企业通讯与办公工具,具有与微信一致的沟通体验,丰富的 OA 应用,和连接微信生态的能力,可帮助企业连接内部、连接生态伙伴、连接消费者。专业协作、安全管理、人即服务。其功能主要包含:企业通讯,文档模块,会议模块,邮件模块,日程模块,微信模块。
- 完成企业微信的 Web 自动化测试
- 完成登录企业微信 Web 端自动化用例
- 完成添加成员自动化用例
- 完成删除成员自动化用例
- 输出测试报告
实战思路

设计测试用例
| 测试模块 | 用例标题 | 前置条件 | 用例步骤 | 预期结果 | 实际结果 |
|---|---|---|---|---|---|
| 成员模块 | 添加成员 | 登录成功 | 1. 成功进入添加成员页面 2.输入成员信息点击保存 3.检查成员列表页面 |
1. 成功添加学员 2. 添加成功的成员展示在成员列表里面 |
|
| 成员模块 | 添加成员,输入重复账号 | 登录成功 | 1. 成功进入添加成员页面 2.输入重复标识的成员信息点击保存 3.检查成员列表页面 |
1. 添加学员失败提示账号已被占用 |
Web 自动化测试方案设计
web 测试方案实现
元素定位
- 八大定位
- CSS 高级定位
- Xpath 高级定位
用户交互模拟
- 控件交互
- 执行 JavaScript 脚本
web 界面特性处理
- cookie 复用
- 显式等待机制
- 执行 JavaScript 脚本
- 窗口切换
测试脚本维护
- POM 设计模式的学习(下一章节)
跨浏览器兼容性
- selenium 使用,支持多个浏览器驱动。
用例独立性
- 用例和用例之间没有耦合关系。
# add 无需考虑在get之前执行或之后执行。
def test_add_department(self):
    ...


def test_get_department(self):
    ...
用例执行过程
- 添加 mark 标签以区分用例适用的不同的环境。
# p1级别用例
@pytest.mark.P1
# 冒烟测试用例
@pytest.mark.smoke
def test_get_department(self):
    print("=======123")
    assert False
用例的结果报告
- 注意:这些关键字的设定只要内部达成一致,设计合理即可。
| allure 关键字 | 对应层级 |
|---|---|
| step | 对应测试用例操作步骤,对页面的具体操作 |
| title | 对应测试用例,一个title一条用例 |
  @allure.title("添加部门测试")
  def test_add_department(self):
      with allure.step("点击添加按钮"):
          print("点击添加按钮")
      with allure.step("输入部门名称"):
          print("输入部门名称")
      with allure.step("点击确定按钮"):
          print("点击确定按钮")
      with allure.step("获取部门列表"):
          print("获取部门列表")
测试数据管理
- 在测试用例结束之后清理掉对应的测试数据。
  @allure.title("添加部门测试")
  def test_add_department(self):
      with allure.step("点击添加按钮"):
          print("点击添加按钮")
      with allure.step("输入部门名称"):
          print("输入部门名称")
      with allure.step("点击确定按钮"):
          print("点击确定按钮")
      with allure.step("获取部门列表"):
          print("获取部门列表")
      with allure.step("删除部门"):
          print("删除部门")
测试环境管理
- 用例设计需要能够支持环境切换。
# 从环境变量读取当前环境
default = os.getenv("env", default="test")
# 读取对应的环境配置文件
data = yaml.safe_load(open(f"./config/{default}.yaml"))
# mac设置环境变量
export env=dev
# windows 设置环境变量
set env=dev
实战:搭建 Web 自动化测试环境
Selenium 工作原理
- Selenium WebDriver
- Selenium IDE
- Selenium Grid
- 面试题参考贴:https://ceshiren.com/t/topic/22890

配置 Driver
- Github 地址
- 安装:
pip install webdriver-manager
from selenium import webdriver
from webdriver_manager.chrome import ChromeDriverManager
from selenium.webdriver.chrome.service import Service
service = Service(executable_path=ChromeDriverManager().install())
driver = webdriver.Chrome(service=service)
实战:登录企业微信 Web 端
- 扫码登录
- 解决思路
- 复用浏览器
- 使用 Cookie 自动登录
使用复用浏览器方式登录
- 找到 chrome 的启动路径
- 配置环境变量
- 验证是否启动成功
- windows:
chrome --remote-debugging-port=9222 - mac:
Google\ Chrome --remote-debugging-port=9222
- windows:
opt = webdriver.ChromeOptions()
opt.debugger_address = "127.0.0.1:9222"
driver = webdriver.Chrome(options=opt)
使用 Cookie 复用方式登录
# 保存 cookie
# 1. 访问企业微信主页/登录页面
self.driver.get(url)
# 2. 等待20s,人工扫码操作
time.sleep(20)
# 3. 等成功登陆之后,再去获取cookie信息
cookie = self.driver.get_cookies()
print(cookie)
# 将 cookie 写入文件
with open("cookie.yaml", "w") as f:
    yaml.safe_dump(cookie, f)
# 使用 cookie 登录
# 从文件中获取 cookie 信息登陆
with open("cookie.yaml", "r", encoding="utf-8") as f:
    cookies = yaml.safe_load(f)
print(f"读取出来的cookie:{cookies}")
for cookie in cookies:
    try:
        # 添加 cookie
        self.driver.add_cookie(cookie)
    except Exception as e:
        print(e)
time.sleep(3)
课堂练习
- 注册企业微信账号:https://work.weixin.qq.com
- 使用 Cookie 复用方式完成企业微信登录
实战:通讯录添加成员
- 步骤:
- 登录
- 进入首页
- 点击【通讯录】按钮
- 点击【添加成员】按钮
- 填写添加成员信息
- 点击【保存】按钮
- 验证 ==> 断言
# test_wework.py

class TestWework:

    def setup_class(self):
        service = Service(executable_path=ChromeDriverManager().install())
        self.driver = webdriver.Chrome(service=service)
        self.driver.implicitly_wait(15)
        self.driver.get("https://work.weixin.qq.com/wework_admin/frame#index")
        self.driver.maximize_window()
        self.fake = Faker("zh_CN")
        time.sleep(1)
        # 从文件中获取 cookie 信息登陆
        with open("cookie.yaml", "r", encoding="utf-8") as f:
            cookies = yaml.safe_load(f)
        print(f"读取出来的cookie:{cookies}")
        for cookie in cookies:
            try:
                # 添加 cookie
                self.driver.add_cookie(cookie)
            except Exception as e:
                print(e)
        time.sleep(3)
        self.driver.get("https://work.weixin.qq.com/wework_admin/frame#index")

    def teardown_class(self):
        self.driver.quit()

    def test_add_member(self):
        '''
        添加成员
        :return:
        '''
        # 点击通讯录按钮
        self.driver.find_element(By.ID, "menu_contacts").click()
        # 进入通讯录页面
        # 等待成员列表加载完毕
        WebDriverWait(self.driver, 10).until(
            expected_conditions.visibility_of_element_located((By.ID, "member_list"))
        )
        # 点击添加成员按钮
        self.driver.find_element(By.CSS_SELECTOR, ".ww_operationBar .js_add_member").click()
        time.sleep(3)
        # 数据准备
        # 姓名
        mname = self.fake.name()
        # 账号
        mid = self.fake.uuid4()
        # 手机号
        phone_num = self.fake.phone_number()
        # 输入姓名
        self.driver.find_element(By.ID, "username").send_keys(mname)
        # 输入账号
        self.driver.find_element(By.ID, "memberAdd_acctid").send_keys(mid)
        # 输入手机号
        self.driver.find_element(By.ID, "memberAdd_phone").send_keys(phone_num)
        # 点击保存按钮
        self.driver.find_element(By.CSS_SELECTOR, ".qui_btn.ww_btn.js_btn_save").click()
        # 获取保存结果提示信息
        tips = WebDriverWait(self.driver, 10).until(
            expected_conditions.element_to_be_clickable((By.ID, "js_tips"))
        )
        # 根据提示信息断言
        assert tips.text == "保存成功"
        # 获取成员列表信息
        # 等待成员列表加载完毕
        WebDriverWait(self.driver, 10).until(
            expected_conditions.element_to_be_clickable((By.ID, "member_list"))
        )
        # 定位 .member_colRight_memberTable_td 同一级兄弟元素中的第二个
        names = self.driver.find_elements(By.CSS_SELECTOR, ".member_colRight_memberTable_td:nth-child(2)")
        name_list = []
        for n in names:
            name_list.append(n.text)
        # 断言新添加成员姓名在列表中
        assert mname in name_list
自动生成测试数据
fake = Faker("zh_CN")
# 数据准备
# 姓名
mname = fake.name()
# 账号
mid = fake.uuid4()
# 手机号
phone_num = fake.phone_number()
课堂练习
- 完成添加成员,输入更多成员信息
- 完成删除成员
实战:生成测试报告
Allure 环境搭建
- 安装 Java,需要配置环境变量。
- 安装 Allure ,需要配置环境变量。
- 下载地址
- mac/linux: 下载 tar
- windows: 下载 zip
- 配置环境变量:解压后将 bin 目录加入 PATH 环境变量。
- 执行命令验证环境:
allure --version - 详细安装步骤参考:https://ceshiren.com/t/topic/3386
- 下载地址
- 安装插件:
- Python:
pip install allure-pytest
- Python:
添加报告描述信息
- 添加业务描述
- 添加功能描述
- 添加测试标题
- 添加步骤描述
@allure.feature("企业微信通讯录")
class TestWeworkWeb:

    def setup_class(self):
        # opt = webdriver.ChromeOptions()
        # opt.debugger_address = "127.0.0.1:9222"
        service = Service(executable_path=ChromeDriverManager().install())
        # self.driver = webdriver.Chrome(service=service, options=opt)
        self.driver = webdriver.Chrome(service=service)
        self.driver.implicitly_wait(15)
        self.driver.get("https://work.weixin.qq.com/wework_admin/frame#index")
        self.driver.maximize_window()
        self.fake = Faker("zh_CN")
        time.sleep(1)
        # 从文件中获取 cookie 信息登陆
        with open("cookie.yaml", "r", encoding="utf-8") as f:
            cookies = yaml.safe_load(f)
        print(f"读取出来的cookie:{cookies}")
        for cookie in cookies:
            try:
                # 添加 cookie
                self.driver.add_cookie(cookie)
            except Exception as e:
                print(e)
        time.sleep(3)
        self.driver.get("https://work.weixin.qq.com/wework_admin/frame#index")

    def teardown_class(self):
        self.driver.quit()


    @allure.story("添加成员")
    @allure.title("添加成员冒烟用例")
    def test_add_member(self):
        '''
        添加成员
        :return:
        '''
        with allure.step("点击通讯录按钮"):
            # 点击通讯录按钮
            self.driver.find_element(By.ID, "menu_contacts").click()
        with allure.step("点击添加成员按钮"):
            # 进入通讯录页面
            # 等待成员列表加载完毕
            WebDriverWait(self.driver, 10).until(
                expected_conditions.visibility_of_element_located((By.ID, "member_list"))
            )
            # 点击添加成员按钮
            self.driver.find_element(By.CSS_SELECTOR, ".ww_operationBar .js_add_member").click()
            time.sleep(3)
        with allure.step("准备测试数据"):
            # 数据准备
            # 姓名
            mname = self.fake.name()
            # 账号
            mid = self.fake.uuid4()
            # 手机号
            phone_num = self.fake.phone_number()
        with allure.step("输入姓名"):
            # 输入姓名
            self.driver.find_element(By.ID, "username").send_keys(mname)
        with allure.step("输入账号"):
            # 输入账号
            self.driver.find_element(By.ID, "memberAdd_acctid").send_keys(mid)
        with allure.step("输入手机号"):
            # 输入手机号
            self.driver.find_element(By.ID, "memberAdd_phone").send_keys(phone_num)
        with allure.step("点击保存按钮"):
            # 点击保存按钮
            self.driver.find_element(By.CSS_SELECTOR, ".qui_btn.ww_btn.js_btn_save").click()
            # 获取保存结果提示信息
            tips = WebDriverWait(self.driver, 10).until(
                expected_conditions.element_to_be_clickable((By.ID, "js_tips"))
            )
        with allure.step("断言提示信息"):
            # 根据提示信息断言
            assert tips.text == "保存成功"
        with allure.step("断言添加结果"):
            # 获取成员列表信息
            # 等待成员列表加载完毕
            WebDriverWait(self.driver, 10).until(
                expected_conditions.element_to_be_clickable((By.ID, "member_list"))
            )
            # 定位 .member_colRight_memberTable_td 同一级兄弟元素中的第二个
            names = self.driver.find_elements(By.CSS_SELECTOR, ".member_colRight_memberTable_td:nth-child(2)")
            name_list = []
            for n in names:
                name_list.append(n.text)
            # 断言新添加成员姓名在列表中
            assert mname in name_list
课堂练习
- 生成 Allure 报告
总结
- Selenium 环境搭建
- Selenium 自动化脚本编写
- Cookie 复用登录
- Fake 造数据
- Allure 报告